Sunday, August 01, 2010
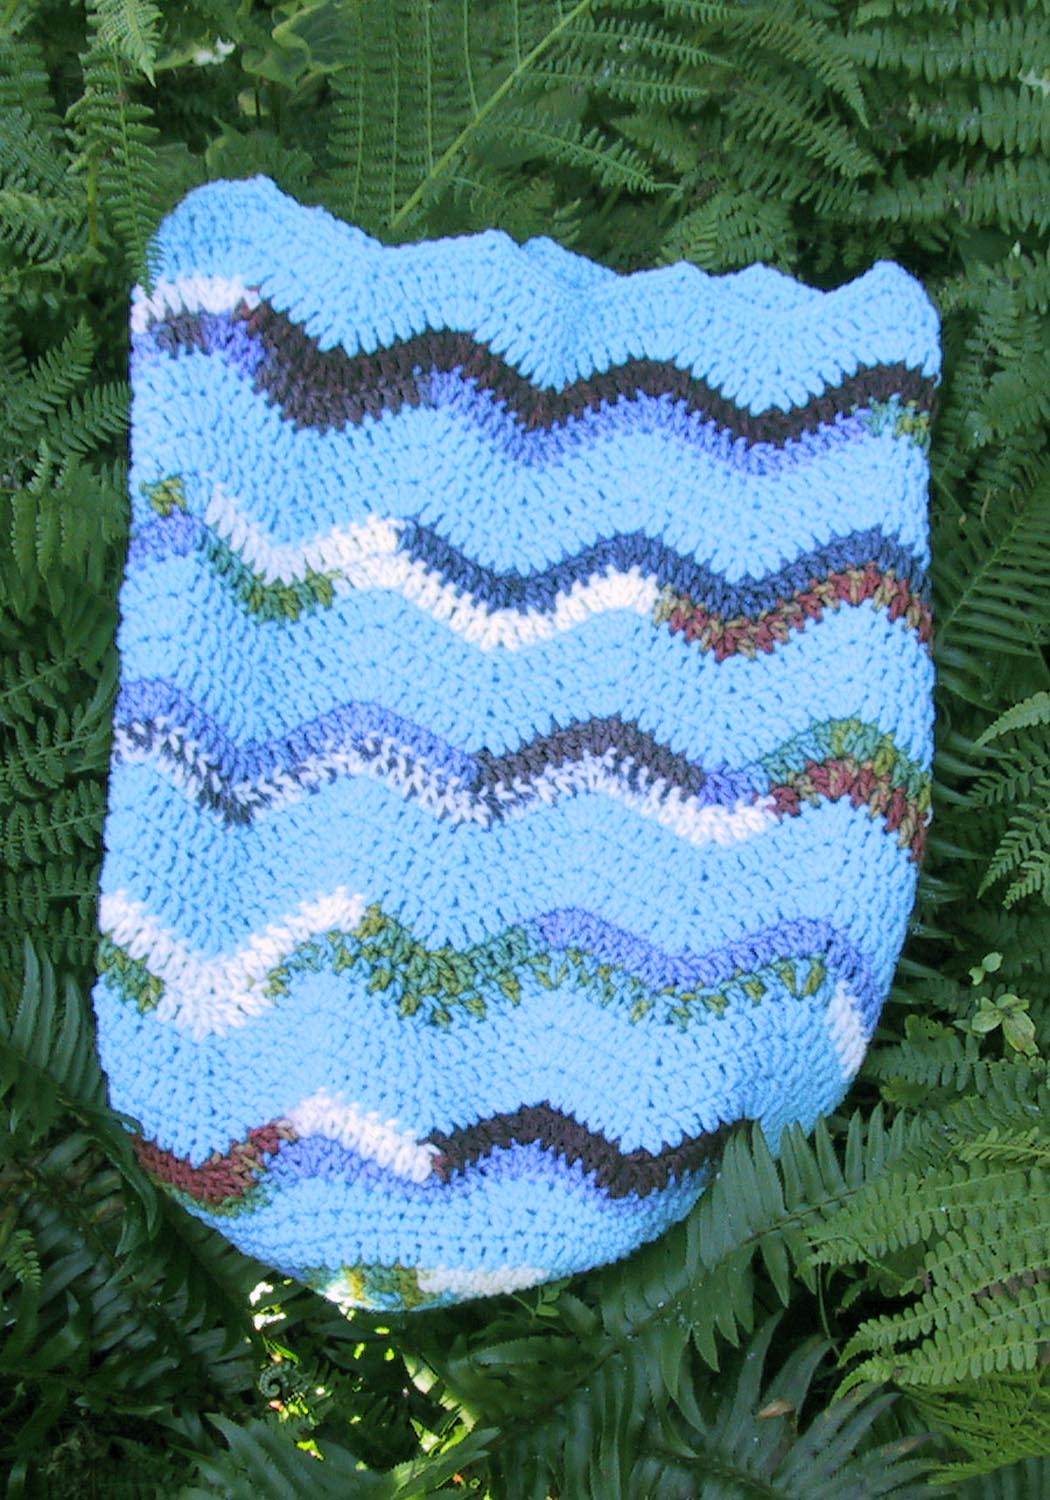
BIG RIPPLE SLEEP SACK
Thank you Virginia for testing this pattern
SIZE: 3-9 months
GAUGE: Unimportant
MATERIALS:
Worsted weight yarn approximately 10 ounces
I (5.5 mm) Crochet hook for sleep sack
US G (4.5 mm) or H (5.0 mm) crochet hook for cap
Tapestry needle
Notes:
1. Read the pattern all the way through before beginning.
2. When changing color complete the last stitch of the round with the new color. Work in the ends as you go. See instructions for the way I handle color changes at bottom of instructions.
3. For the sleep sack in the photograph I used Red Heart Super Saver Peruvian Print and Turqua.
4. Actual measurements 30 inch circumference and 22 inch length. To make longer repeat round 10 until desired length.
Special Stitches:
Dc dec over 3 (decrease) = Yo and draw up a loop in next st, yo and draw through 2 loops, skip next sts, yo and draw up a loop in next st, yo and draw through 2 loops, yo and draw through all 3 loops on hook.
Sc dec over 3 (decrease) = Draw up a loop in next st, skip next dc, draw up a loop in next st, yo and draw through all 3 loops on hook.
Sc dec (decrease) = Draw up a loop in next st, draw up a loop in next st, yo and draw through all 3 loops on hook.
INSTRUCTIONS:
Round 1: Ch 3, 12 dc in the 3rd ch from hook. Join with a slipstitch in first dc, pull slipstitch tight. (12 sts)
Round 2: Ch 2 (do not count as first dc from now on), 2 dc in each st. Join with a slipstitch in first dc, pull slipstitch tight. (24 sts)
Round 3: Ch 2, dc in same st as join. *2 dc in next st, dc in next st. Repeat from * around. End with 2 dc in last st. Join with a slipstitch in first dc, pull slipstitch tight. (36 sts)
Round 4: Ch 2, dc in same st as join, dc in next st. *2 dc in next st, dc in next 2 sts. Repeat from * around. End with 2 dc in last st. Join with a slipstitch in first dc, pull slipstitch tight. (48 sts)
Round 5: Ch 2, dc in same st as join, dc in next 2 sts. *2 dc in next st, dc in 3 sts. Repeat from * around. End with 2 dc in last st. Join with a slipstitch in first dc, pull slipstitch tight. (60 sts)
Round 6: Ch 2, , dc in same st as join, dc in next 4 sts. *2 dc in next st, dc in 5 sts. Repeat from * around. End with 2 dc in last st. Join with a slipstitch in first dc, pull slipstitch tight. (70 sts)
On rounds 7-9 first sc goes in same st as join.
Round 7: Ch 1, *sc in 2 sts, hdc in 2 sts, dc in 1 st, hdc in 2 sts, sc in 3 sts. Repeat from * around. Join with slipstitch in first sc, pull slipstitch tight. (70 sts)
Round 8: Ch 1, *sc in 2 sts, hdc in 2 sts, 3 dc in next st, hdc in 2 sts, sc in 3 sts. Repeat from * around. Join with slipstitch in first sc, pull slipstitch tight. (84 sts and 7 points)
Round 9: Ch 1, *sc in 2 sts, hdc in 2 sts, dc in next st, 3 dc in next st, dc in next st, hdc in 2 sts, sc in 3 sts. Repeat from * around. Join with slipstitch in first sc, DO NOT pull slipstitch tight. (98 sts)
Round 10-32: Slipstitch in next st, (pull this slipstitch tight, but be careful not to pull the joining one tight), ch 2, dc in the same st and in next 4 stitches, *3 dc in next stitch, dc in next 5 sts, dc dec over 3 sts, dc in 5 sts. Repeat from * around. End with 3 dc in next st, dc in next 5 sts, dc dec over 3 sts. Join with slipstitch in first dc, DO NOT pull slipstitch tight. (98 sts)
Measure sleep sack, if it isn’t between 21 and 22 inches, work round again.
Round 33: Slipstitch in next st, ch 1, sc in same stitch and next 4 sts. *Sc, ch 2, sc in next st, sc in 5 sts, sc dec over 3 sts, sc in 5 sts. Repeat from * around. End round with sc, ch 2, sc in next st, sc in 5 sts, sc dec over 3 sts. Do not join, fasten off and use the tapestry needle to join and weave in end.
RIPPLE CAP INSTRUCTIONS:
SIZE: Small 15 inches (medium 16 inches)
For small use G hook (medium use H hook)
Round 1: Ch 3, make 12 dc in third ch from hook. Join with a slipstitch in first dc, pull slipstitch tight. (12 sts)
Round 2: Ch 3 (counts as dc), (dc, ch 1, 2 dc in same st as join). *Skip 1 st, (2 dc, ch 1, 2 dc in next st). Repeat from * around. Join with a slipstitch in top of ch 3, DO NOT pull slipstitch tight. (six 2 dc, ch 1, 2 dc groups)
Round 3: Slipstitch in next st, (pull this slipstitch tight, but be careful not to pull the joining one tight), ch 2, dc in same st as join, (2 dc, ch 1, 2 dc in ch 1 space), dc in next st. * Sc dec in next 2 sts, dc in next st, (2 dc, ch 1, 2 dc in ch 1 space), dc in next st. Repeat from * around. End with sc dec. Join with a slipstitch in top of first dc, DO NOT pull slipstitch tight. (six 3 dc, ch 1, 3 dc groups)
Round 4: Slipstitch in next st, (pull this slipstitch tight, but be careful not to pull the joining one tight), ch 2, dc in same st, dc in next st, (2 dc, ch 1, 2 dc in ch 1 space), dc in next 2 sts. * Dc dec over 3 sts, dc in next 2 sts, (2 dc, ch 1, 2 dc in ch 1 space), dc in next 2 sts. Repeat from * around. End with dc dec over 3 sts. Join with a slipstitch in top of first dc, DO NOT pull slipstitch tight. (six 4 dc, ch 1, 4 dc groups)
Round 5-9 (10): Slipstitch in next st, (pull this slipstitch tight, but be careful not to pull the joining one tight), ch 2, dc in same st, dc in next 2 sts, (dc, ch 1, dc in ch 1 space), dc in next 3 sts, * dc dec over 3, dc in next 3 sts, (dc, ch 1, dc in ch 1 space), dc in next 3 sts. Repeat from * around. End with dc dec over 3 sts. Join with a slipstitch in top of first dc, DO NOT pull slipstitch tight. (6 4 dc, ch 1, 4 dc groups)
Round 10 (11): Slipstitch in next st, (pull this slipstitch tight, but be careful not to pull the joining one tight), ch 1, sc in same st, sc in next 2 sts, (sc, ch 2, sc in ch 1 space), sc in 3 sts, * sc dec over 3 sts, sc in next 3 sts, (sc, ch 2, sc in ch 1 space), sc in next 3 sts. Repeat from * around. End with sc dec over 3 sts. Join with a slipstitch in top of first sc. (6 4 sc, ch 2, 4 sc groups)
Fasten off, weave in ends.
Color changes:
What I do is; cut the yarn leaving a tail about 4 inches long. Then I join the new color yarn by completing the last pull through of the stitch with the new yarn. I work about 10 stitches, turn my work over and find the two tails. Adjust the tails so that the stitches are uniform at the join. Then I tie a square knot. I know lots of people say NO KNOTS. I've been crocheting a long time and have been doing it this way and have never had a crocheted item come apart.
Okay, now you have a knot near the top of your work, use your hook to weave one tail in and out of the back loop of your work about six times. Weave the other tail the opposite direction, also in the back loop. End your weaving with the yarn tails on the back side. Now crochet away. When you come to the woven section on your next round, crochet right over it like it isn't even there. When you are all finished go back and trim off the little tails that remain. You won't be able to see the join, and it will NEVER come undone.
I had started a grogery bag holder for the kitchen that i tried to make but this is what i had in mind, thanks.
Also i never thought to make a nice little papoose, it's a great pattern!
Kathryn

 : 11:45 AM : 11:24 AM : 10:22 AM
 It has been crocheted many times by many crocheters, so I am confident the stitch count is correct.
: 3:35 AM << Home
![]()
